Crocheting is a whole world of needlework with its own rules and characteristic features, having entered it is impossible to go back. This craft awards craftswomen with beautiful and original things, one has only to learn its basics - knitting columns.
In order to continue to feel confident, beginners need to learn how to crochet the simplest elements, thanks to which it becomes possible to create canvases of any complexity with a variety of patterns.
Master class for beginners crochet crochet
Any crochet pattern, from the simplest to the lush and delicate, is created by combining air loops and several types of posts. If you learn to knit them perfectly, you can safely start crocheting things of any complexity.
What are the main types of crochet crochet?
- Bars without nakida;
- Double crochets;
- Semi-pillars;
- Bars with two naquids;
- Embossed posts;
- Magnificent columns.
Without nakida

This type is considered one of the most used methods of knitting columns - and therefore the basic skill necessary for all skilled workers. The crochet method of crochet stitches without nakida allows you to get a dense canvas of low columns, not characterized by high elasticity.
This knitting technique offers several options for looping: for the front wall of the loop, for the back wall and for both walls. Depending on this, the pattern on the canvas will also differ. Often knitting without crochet involves knitting for both walls of the loop (in other words, for both half-loops of the upper braid) —this option is often assumed in all knitting patterns. Consider how to knit crochet without crochet using the example of a step-by-step scheme:
We knit a chain of 20 air loops plus 1 lifting loop. The first column knit in the second from the hook air loop. Enter the hook under the two walls of the loop, pick up the thread and pull it through the loop: two loops formed on the hook (photo 1). Now again we catch the thread and stretch it through both loops. On the hook is one loop. We tied a single crochet (photo 2).

Next, we knit the first row of columns, but pick up the air loop by the front wall - the initial row is more convenient to knit (photo 3). We turn over the work, we knit one loop of rise, and then a row of columns, picking up the loops by both walls.
In order for the web edge to turn out smooth, it is important to correctly knit the first and last loops of the row. Often, especially if they are knitted with thin threads, the first loop of the row is passed through and the columns of the next row are knitted right into the second loop, or they forget to knit the last loop happy. Be careful and, while you study, count the bars. You should always get 20 columns (lifting air loops are not included in this number) (photo 4).

Concerning two other ways of knitting without crochetsThis is done as follows:
 Behind the front wall - so calledposts for the front half knit, if you enter the hook for the first half of you upper pigtails. As a result, the distant half-loops remaining free fall into a flat thin strip on the inside of the canvas.
 Behind the back wall - columns behind the far (back) half-loop knit, if the hook when knitting to enter for the second from you half of the upper pigtail. This canvas has relief concave and convex rows.
 Fig.1: Grabbing the front wall of the loop. Fig.2: grab the rear wall of the loop.
In any of the selected methods for a set of columns without a nakida, the first column in the row is always knitted behind both walls of the loop so that the edge is even and rather dense.
Polustrupbik
Knitting with semi-columns or connecting columns is not so common, as the web of these loops is very dense and hard. The semi-columns are very low. Often they connect fragments of lace sewing, move from one row to another when knitting in a circle, they also fix and process the edges of the canvas at the final stage of knitting.
There are two ways to knit a semi-column:
- double crochet collar - also called a strong column;
- semi-column without nakida - that is, connecting.
Consider for a start,how to crochet polabolik with double crochet.

Let's start with knitting a chain of air loops. The number of air loops should be equal to the number of semi-columns with double crochet plus 2 loops for lifting. When the chain is ready (photo 1), do a hook crochet (photo 2),

we enter the hook into the third loop of the chain from the hook (half-crochet corresponds to 2 lifting loops), grab the thread (photo 1) and draw a new loop (now we have three loops on the hook) (photo 2),

grab the thread again (photo 1) and knit 3 loops on the hook in one go. Turned out double crochet (photo 2).

We continue to knit a number of semi-columns with a crochet. At the end of a row we knit 2 lifting air loops (these loops are the first semi-column of the next row), turn over our product and continue knitting (photo 1). This is what a finished semi-column with a crochet looks like (photo 2).

Now find out how to crochet semi-column or single stitch.

It is difficult to knit semi-columns starting from the chain of air loops, therefore type 20 air loops plus 1 lifting loop and knit several rows with single crochet by the two walls of the loop. Next, we connect several rows of connecting columns.
A lifting loop is not required in this case. Therefore, knitting a series of columns without a nakida turn over the work and immediately knit a half column in the first loop. We enter the hook under both walls of the loop, pick up the thread and pull it through the loop and then immediately into the loop that is on the hook.
Polubic fit in one step - and so on until the end of the series. Turn over the work, knit the next row in the same way. To make knitting easier, do not tighten the loops, make them wide enough, especially for the first and last loops of the row.

Nakidom

A double crochet is considered one of the most frequently used elements among all types of posts. Knit it turns out pretty quickly, and the column turns out to be two times higher than the column without nakida.
So, we will consider the step-by-step instruction how to knit crochet crochet.
Knit a chain of air loops. The number of air loops should be equal to the number of double crochets plus 3 loops for lifting. When our chain is ready, we hook the hook (photo 1), insert the hook into the fourth loop of the chain from the hook (double crochet correspond to 3 lifting loops), grab the thread (photo 2) and pull out a new loop, now we have 3 loops on the hook (photo 3) we seize the thread (photo 4) and knit 3 loops on a hook in pairs in 2 steps, i.e. First, we knit 2 loops (on the hook we will have 2 loops) (Photo 5), then re-seize the thread (Photo 6) and knit 2 more loops. So we diddouble crochet (photo 7). We continue to knit a series of double crochets (photo 8). At the end of the row, we will tie up 3 lifting air loops (they will be the first column for the next row), turn our product around and continue knitting (photo 9).

With two naquids

A crochet double crochet bar allows for a very high loop. Such type of columns is used for receiving openwork free cloths.
After the chain of air loops, the number of which should be equal to the number of columns with two naquids plus 4 loops for lifting, we do two naquids on the hook (photo 1), enter the hook into the fifth loop of the chain from the hook (the column with two naquids correspond to 4 loops), grab the thread (photo 2) and pull out a new loop, now we have 4 loops on the hook (photo 3). Grab the thread (photo 4) and knit 4 loops on the hook in pairs in 3 steps, i.e. First, we knit 2 loops (on the hook we will have 3 loops) (photo 5) again we seize the thread (photo 6).

and we knit 2 more loops (we will have 2 loops on the hook) (photo 7), again we seize the thread (photo 8) and we knit 2 remaining loops. We connected a column with 2 naquids (photo 9). We continue to knit a series of columns with two crochets (photo 10). At the end of the row, we tie up 4 lift air loops, turn our product around and continue knitting.

Raised
Very beautiful view of knitted columns, which allow to achieve a convex texture of the canvas - embossed crocheted crochet. Similar columns knit ornaments and patterns. And although the relief column resembles a simple double crochet in execution, it has its own characteristic features. It differs in the method of attachment to the posts of the previous row: the embossed column is tied not for the loops of the previous row, the hook is inserted below the columns themselves. In addition, it is important to remember that the embossed columns begin to knit only after they have made at least one row of single crochet or simple columns.
There are two types of embossed columns:
- embossed front columns, before work - "Bulging";
- embossed purlors at work -"Concave".
How do they differ and how to crochet them - consider step by step how to knit in photo lessons.
Convex embossed columns

Knit two rows of simple double crochets. Then we put a hook on the hook (photo 1), enter the hook from the front side from right to left, under the double crochet of the previous row (photo 2), grab the thread (photo 3), and pull out a new loop (there will be three loops on the hook) (photo 4 ), then knit as a regular double crochet, tying the loops in pairs in two steps, i.e. grab the thread and knit two loops, grab the thread again and knit the remaining two loops (photo 5). In the method of knitting a double crochet “before work”, such a column is called a relief face or “convex”.

Concave relief bollards

We make a nakid (photo 1), then we enter the hook from the seamy side from right to left (photo 2), clasping the leg of the double crochet of the previous row (photo 3), grab the thread (photo 4) and pull out a new loop (photo 5). We knit loops in pairs in two steps, as when knitting a regular double crochet, i.e. grab the thread and knit 2 loops, grab the thread again and knit the remaining 2 loops (photo 6). In the method of knitting a double crochet “at work”, such a column is called a relief seamy or “concave”. Similarly knit relief columns without nakida, relief semi-columns with a crochet, etc.

Lush

Beginner needlewomen definitely need to learn how to knit a lush crochet. This type of columns allows you to achieve an unusually beautiful openwork relief pattern, which is also known as "puffs". In addition, the final version is similar to the pattern of "bumps". Magnificent columns fit with semi-columns with a crochet, and the more semi-columns with a crochet are tied into one loop, the more magnificent the bar. It is necessary to knit fluffy columns from light and soft yarn, which will go on this pattern much more than on other types of columns.
According to our scheme, we chain the chain out of the air loops, make a nakid (photo 1), insert the hook into 6 from the hook, loop the chain and draw out a long loop (there are 3 loops on the hook) (photo 2), re-do the loop (photo 3), enter the hook in the same loop of the base, grab the thread and pull out another long loop (on the hook we have 5 loops) (photo 4), again wrap up (photo 5), insert the hook in the same loop of the base, grab the thread and pull another one again a long loop (there are now 7 loops on the hook) (photo 6). Next, we grab the thread (photo 7) and knit all the loops on the hook at one time (photo 8). It turned out a magnificent column. Next, link the 2 ce. (according to the scheme) and knit magnificent columns in the same way (photo 9).

Magnificent bollards with a closed top
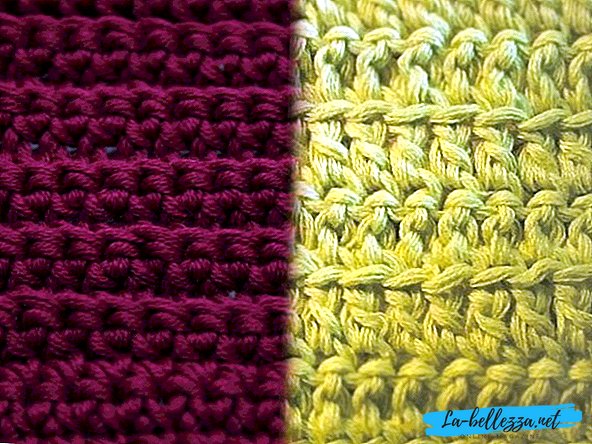
 Fig.1 - magnificent columns with an open top. Fig.2 - magnificent columns with a closed top.
Sometimes lush columns knit with a closed top. They knit similarly, only finish them in 2 steps: we knit the same semi-column with a crochet, pulling out long loops, then grab the thread (photo 1) and knit all the loops, except for the first working loop (there are 2 loops on the hook) (photo 2), seize the thread again and knit the two remaining loops (photo 3), then knit 2 ce. and knit curvy columns in the same way (photo 4).

Video lesson
Video tutoring will help to fix a crochet bollard master class for beginners.
Crochet crochet video